Sewn Superhero Cape Logo And Mask
ADVERTISEMENT
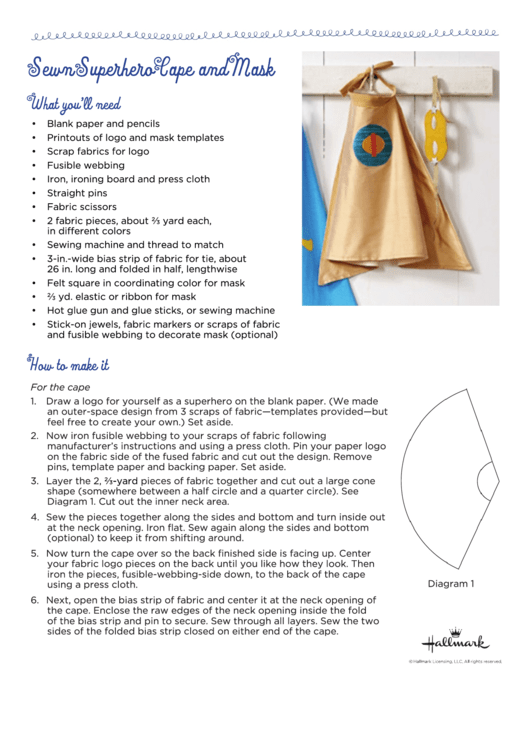
Sewn Superhero Cape and Mask
What you’ll need
• Blank paper and pencils
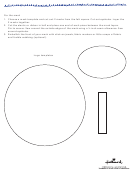
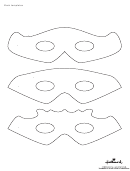
• Printouts of logo and mask templates
• Scrap fabrics for logo
• Fusible webbing
• Iron, ironing board and press cloth
• Straight pins
• Fabric scissors
• 2 fabric pieces, about ⅔ yard each,
in different colors
• Sewing machine and thread to match
• 3-in.-wide bias strip of fabric for tie, about
26 in. long and folded in half, lengthwise
• Felt square in coordinating color for mask
• ⅔ yd. elastic or ribbon for mask
• Hot glue gun and glue sticks, or sewing machine
• Stick-on jewels, fabric markers or scraps of fabric
and fusible webbing to decorate mask (optional)
How to make it
For the cape
1. Draw a logo for yourself as a superhero on the blank paper. (We made
an outer-space design from 3 scraps of fabric—templates provided—but
feel free to create your own.) Set aside.
2. Now iron fusible webbing to your scraps of fabric following
manufacturer’s instructions and using a press cloth. Pin your paper logo
on the fabric side of the fused fabric and cut out the design. Remove
pins, template paper and backing paper. Set aside.
3. Layer the 2, ⅔-yard pieces of fabric together and cut out a large cone
shape (somewhere between a half circle and a quarter circle). See
Diagram 1. Cut out the inner neck area.
4. Sew the pieces together along the sides and bottom and turn inside out
at the neck opening. Iron flat. Sew again along the sides and bottom
(optional) to keep it from shifting around.
5. Now turn the cape over so the back finished side is facing up. Center
your fabric logo pieces on the back until you like how they look. Then
iron the pieces, fusible-webbing-side down, to the back of the cape
Diagram 1
using a press cloth.
6. Next, open the bias strip of fabric and center it at the neck opening of
the cape. Enclose the raw edges of the neck opening inside the fold
of the bias strip and pin to secure. Sew through all layers. Sew the two
sides of the folded bias strip closed on either end of the cape.
ADVERTISEMENT
0 votes
Related Articles
Related forms
Related Categories
Parent category: Miscellaneous
 1
1 2
2 3
3


